Help Center / Payroll
How should I add my payroll participants?
How should I add payroll participants?
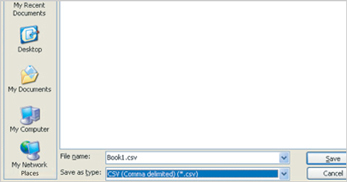
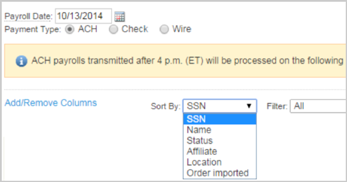
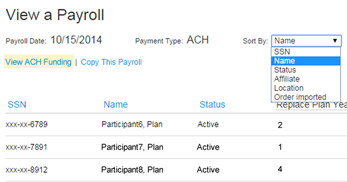
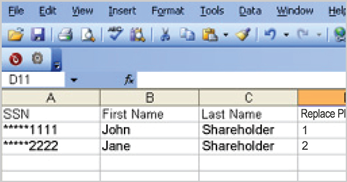
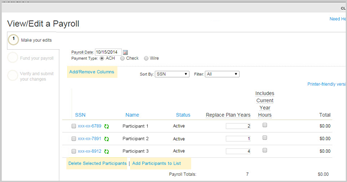
We offer three processes for remitting payroll contributions. You can enter each participant’s information manually, import information for an entire list of participants via a spreadsheet or utilize our payroll integration services (for approved payroll providers only).
For more information about our payroll integration services, call us at (800) 421-6019 to see if your payroll provider is integrated with our program. Otherwise, review the table below to decide whether the manual or import option is a better fit for your plan.
For more information about our payroll integration services, call us at (800) 421-6019 to see if your client’s payroll provider is integrated with our program. Otherwise, review the table below to decide whether the manual or import option is a better fit for the plan.
| Manual | Import | |
|---|---|---|
| Ideal for smaller plans |  |
|
| Ideal for larger plans | |
|
| Easier to implement | |
|
| Allows you to save payroll and continue at a later time | |
|
| Can process payroll entirely online | |
|
| Enter payroll by hand | |
|
| Ideal for plans with an existing payroll file | |
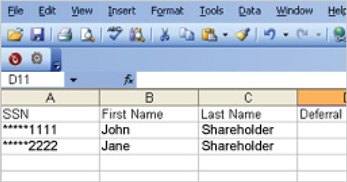
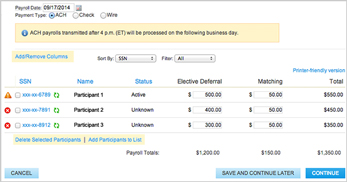
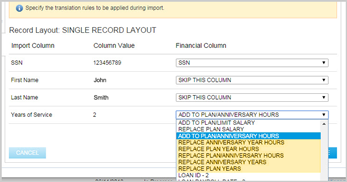
What information do I need to set up a payroll manually or import a payroll spreadsheet?
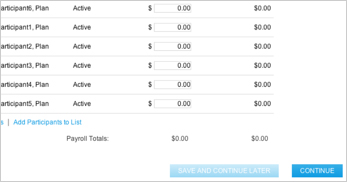
For either type of payroll setup, before starting, you will need the following:
- A list of payroll participants
- The type and amount of payroll deduction for each participant
- If applicable, the type and amount of employer contributions for each participant
- The total amount of both employee and employer contributions
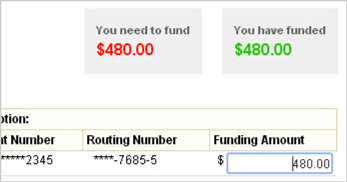
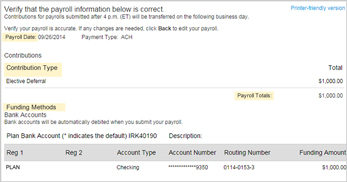
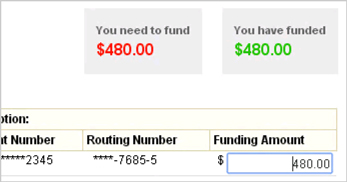
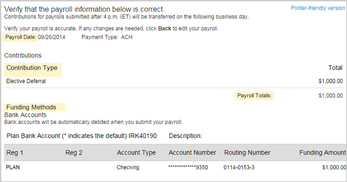
- Confirmation of the bank account you intend to use to fund your payroll contribution. If you need to add or update a bank account, submit the Bank Draft Authorization Change Request form.
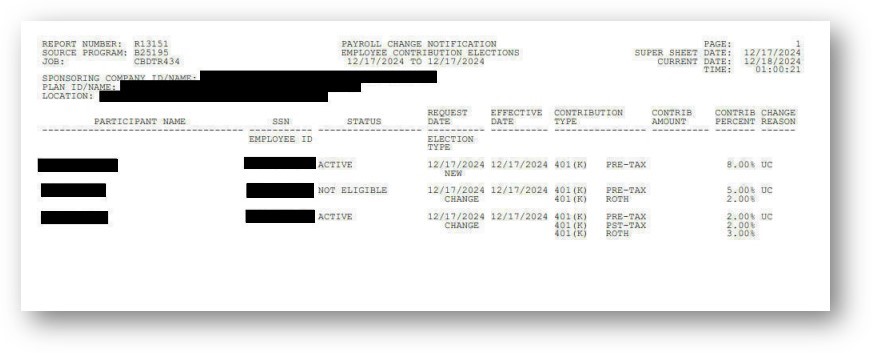
This information can be found in the plan’s payroll report, which can be provided by the plan’s outside payroll provider or an internal payroll department.
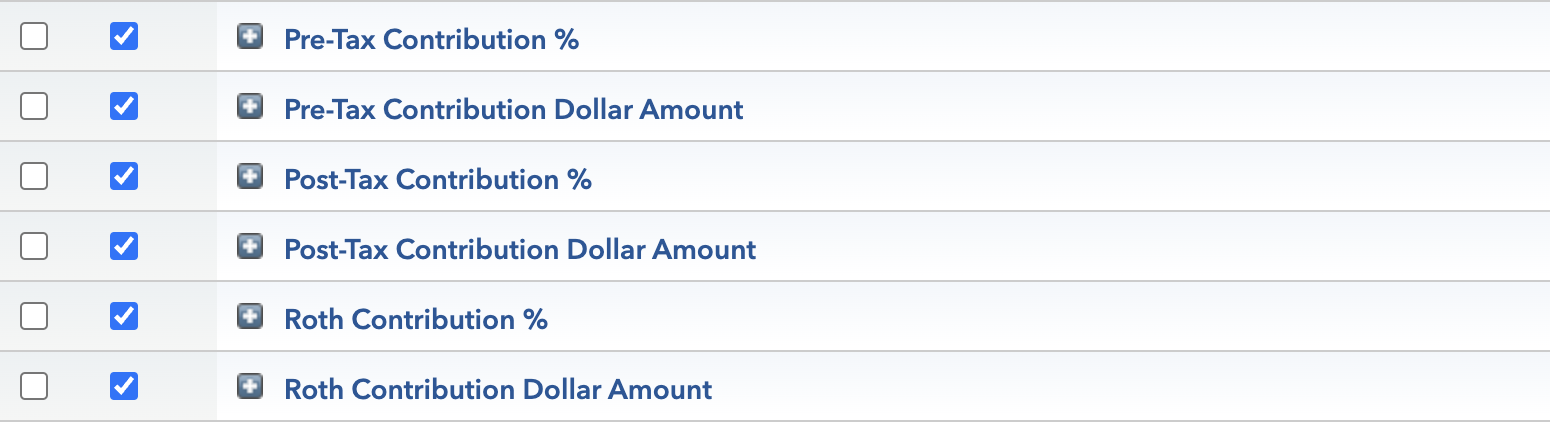
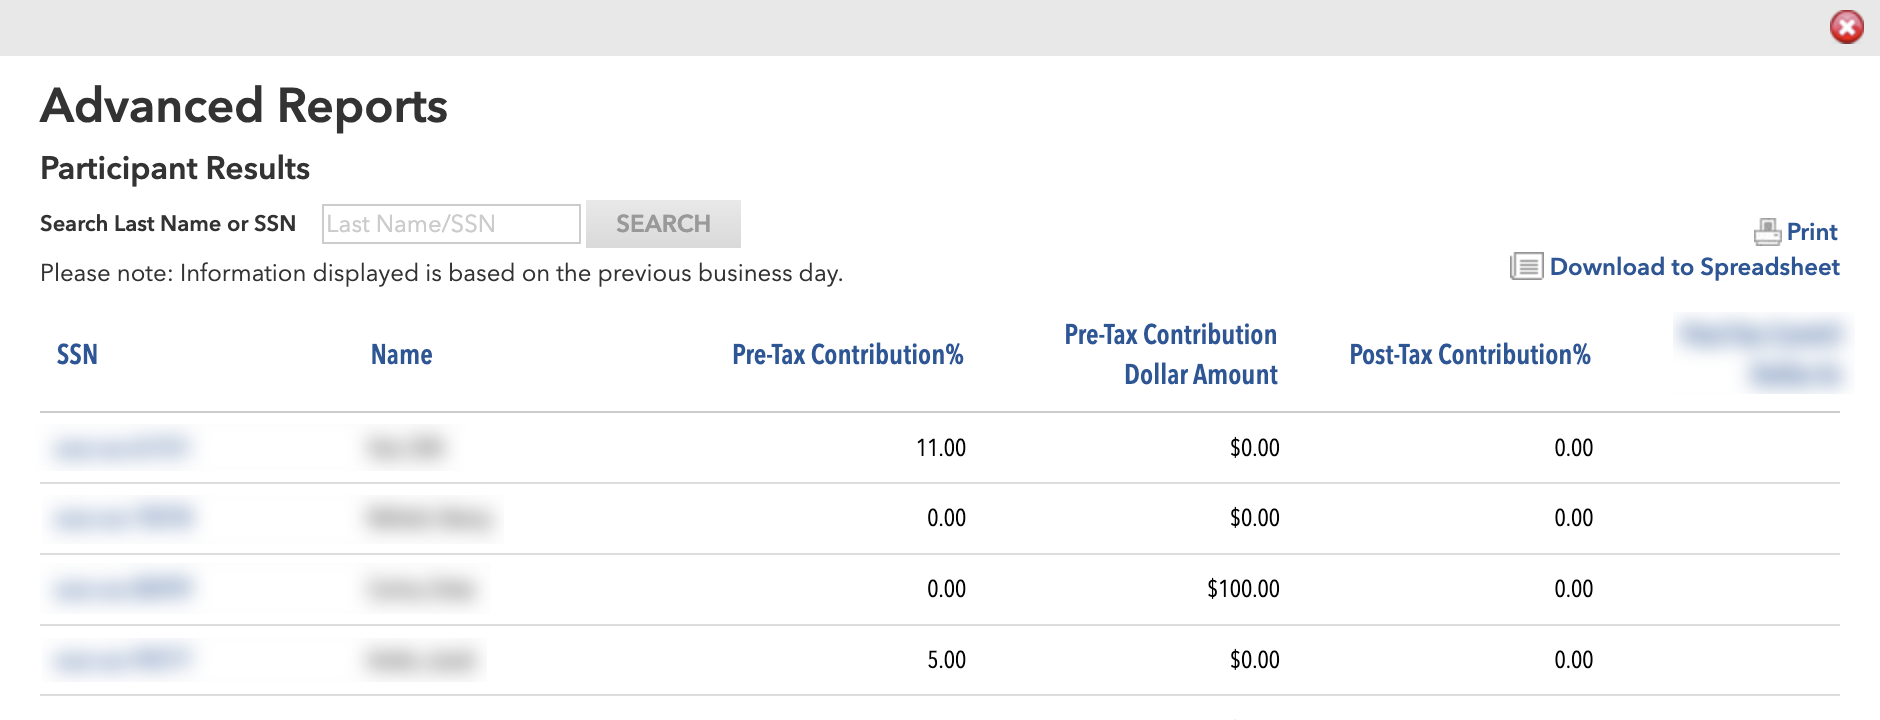
If your plan is utilizing deferral designation services ‒ part of the Online Enrollment feature suite ‒ you can also access the latest participant deferral elections through the Reports & Analysis section of this site. Refer to the Administration Guide or the Deferrals section of the Help Center for more details about how to access this report.
If the plan is utilizing deferral designation services ‒ part of the Online Enrollment feature suite ‒ you can also access the latest participant deferral elections through the Reports & Analysis section of the plan sponsor site. Refer to the Administration Guide or the Deferrals section of the Help Center for more details about how to access this report.
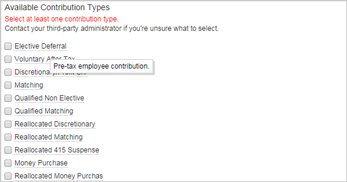
Note: If you plan to fund your payroll with forfeiture accounts, please call your third-party administrator.

Help Center / Eligibility
How do the Employee Deferral Eligibility Tracking Services work?
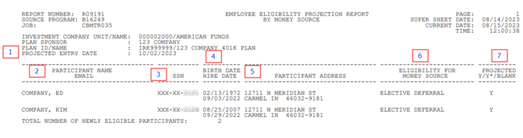
Capital Group offers Employee Deferral Eligibility Tracking Services to help track employees’ eligibility to contribute to their retirement plan. These services are available to plans with an eligibility period of at least 60 days.
New plans can activate the services as part of their implementation paperwork. Existing plans that want to activate them can submit the Automatic Enrollment Services election form.
The Employee Deferral Eligibility Tracking Services offer the following benefits:
- Capital Group will track each employee’s progression towards eligibility based on the plan’s requirements, reducing the administrative load for plan sponsors and third-party administrators
- The plan sponsor will receive notifications when employees are projected to become eligible within the next 60 days, as well as when employees are enrolled in the plan, in order to update payroll withholding
- We will also send invitations by email or mail to employees who are approaching eligibility, inviting them to enroll in the plan (or decline enrollment)
Help Center / Enrollment
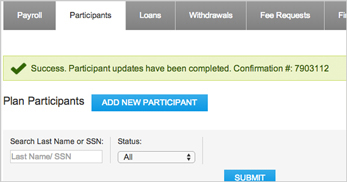
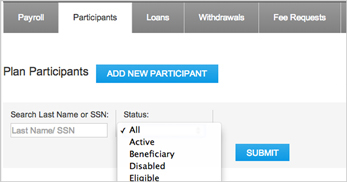
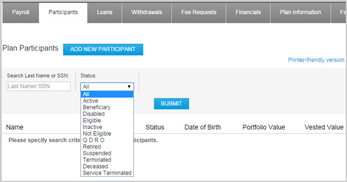
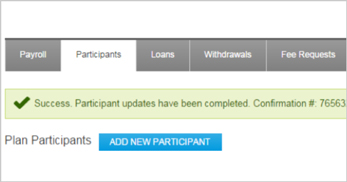
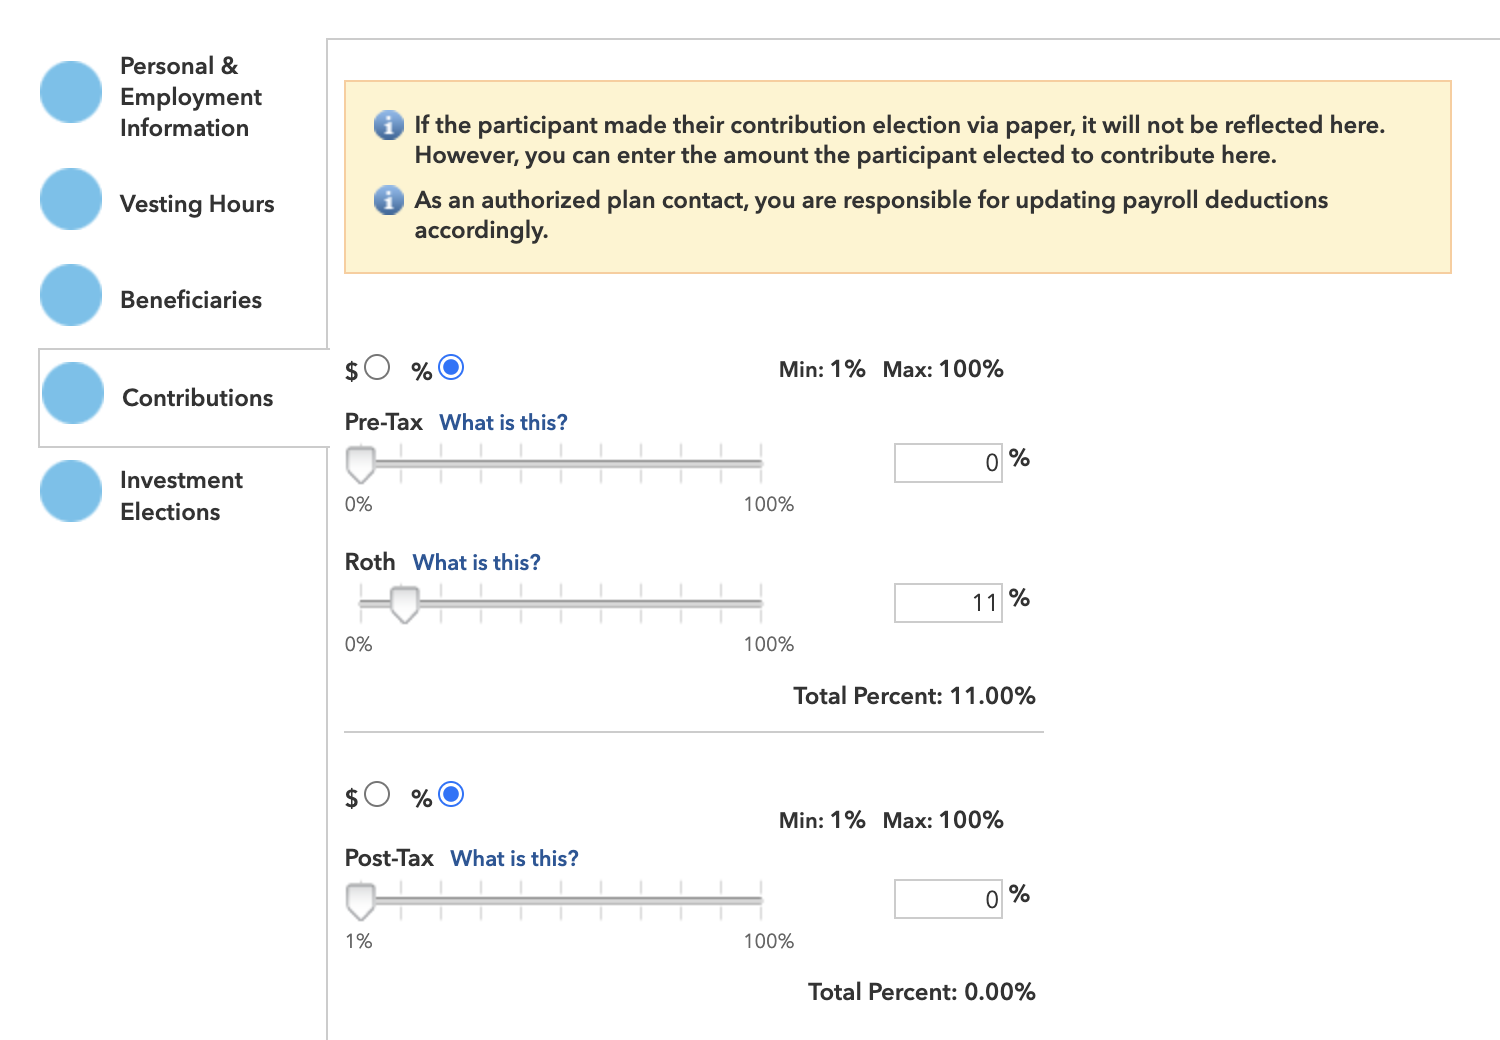
What information do I need to add participants?
Before starting, you will need each participant’s:
- Social Security number
- First and last name
- Birth date
- Mailing address
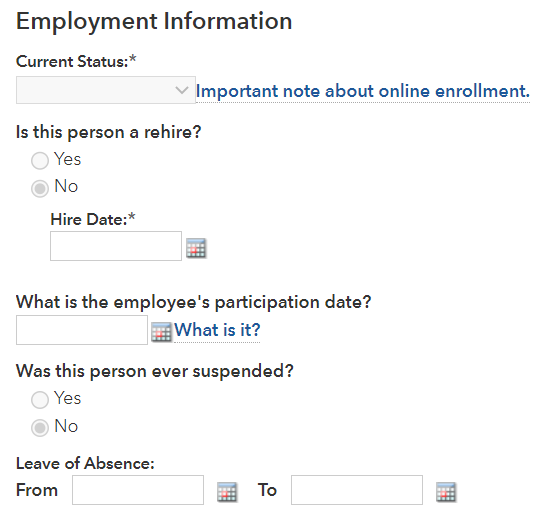
- Current plan status* (e.g., eligible, terminated)
- Hire date
- Participation date (if not using eligibility tracking services)
- Phone number (optional)
- Email address (optional)
- Payroll frequency (if the plan allows for loans)
- Investment elections (not required for those enrolling online)
* Participants must be added in “eligible” or “not eligible” status in order to be able to enroll online.
* Participants must be added in “eligible” or “not eligible” status in order to be able to enroll online.


Help Center / Vesting
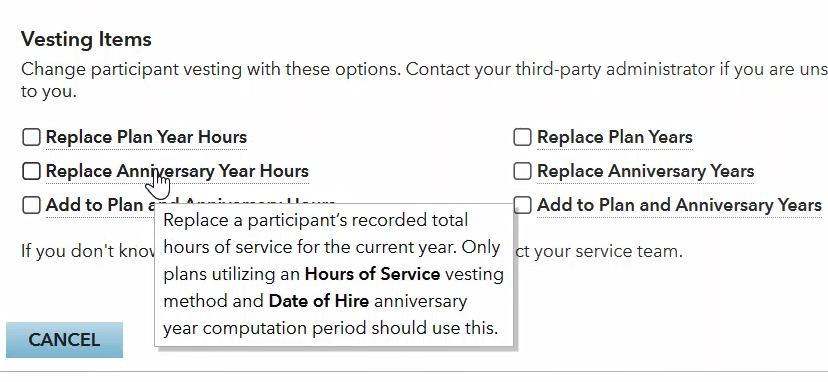
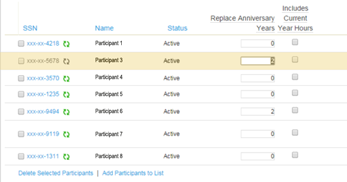
What information do I need to manage vesting for participants in my plan?
What information do I need to manage vesting for participants in a plan?
Before starting, you will need:
- Employee hire date (This should be entered on the Personal & Employment Information screen.)
- Vesting computation period (If your plan specifies that vesting begins on an annual date other than a participant’s hire date, then the vesting computation period is measured accordingly.)
- Vesting computation period (If the plan specifies that vesting begins on an annual date other than a participant’s hire date, then the vesting computation period is measured accordingly.)
- Hours worked during the computation period
- Total hours of service for the current year
- Total hours of service at plan’s year-end
- Total hours of service based on participant’s anniversary date
- High earner designation (Required if plans that allow catch-up contributions want access to reporting that can assist with contribution processing and identifying any participants that may require correction. The sponsor or third-party administrator must indicate each year which participants meet the age and income criteria that require catch-up contributions to be made on a Roth after-tax basis.)
Most of this information can be found in employee records. If you are unsure of your plan’s vesting method or computation period, contact your third-party administrator.
Most of this information can be found in employee records.
Help Center / Beneficiary Designation Services
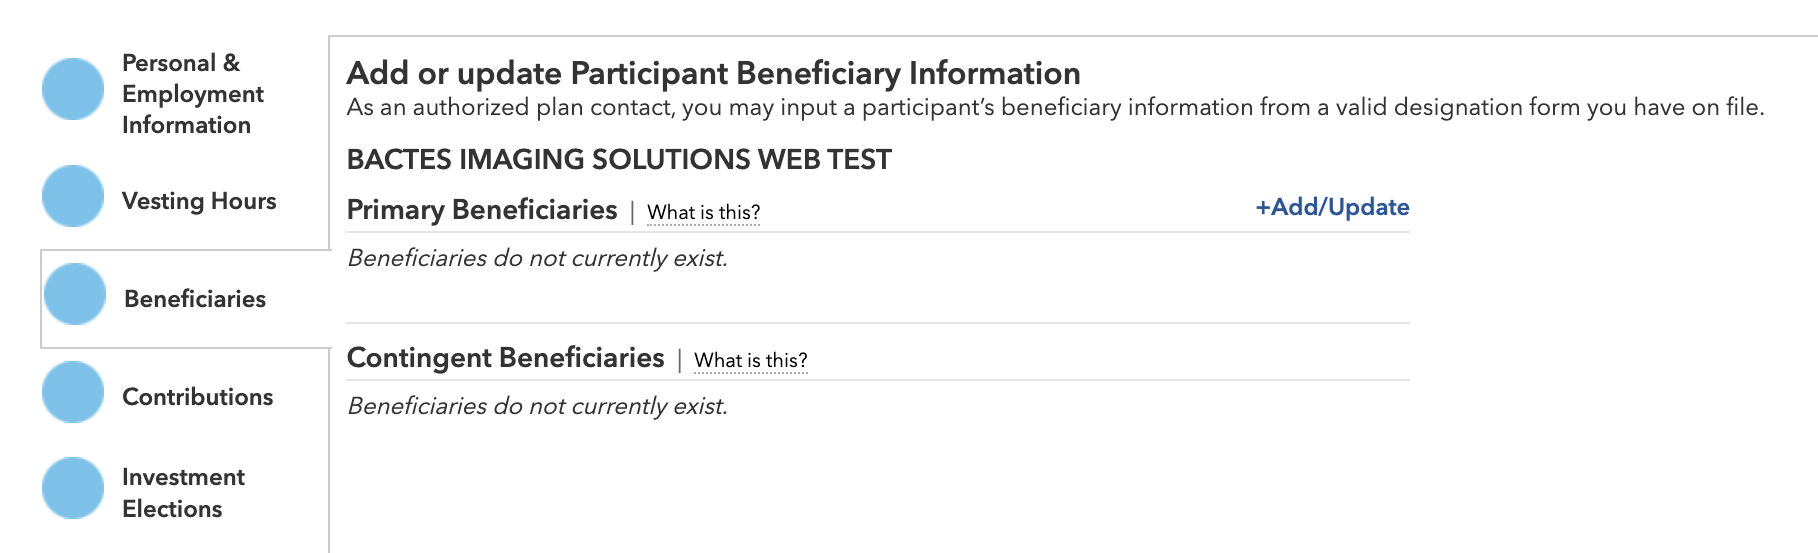
How do Beneficiary Designation Services work?
Beneficiary Designation Services are offered as a standard feature for no additional cost to RecordkeeperDirect® plans as part of the Online Enrollment feature suite. These services are activated by default for all new plans and are subject to the RecordkeeperDirect Online Enrollment Terms and Conditions, which are included in the Online Enrollment Authorization form. Plans that were established before the availability of these services can submit the authorization form (available in the Forms section of this site) to activate them.
Beneficiary Designation Services offer the following benefits:
- Primary and contingent beneficiary designations can be captured during the online enrollment process.
- Primary and contingent beneficiary designations can be modified post-enrollment via the participant website or mobile app.
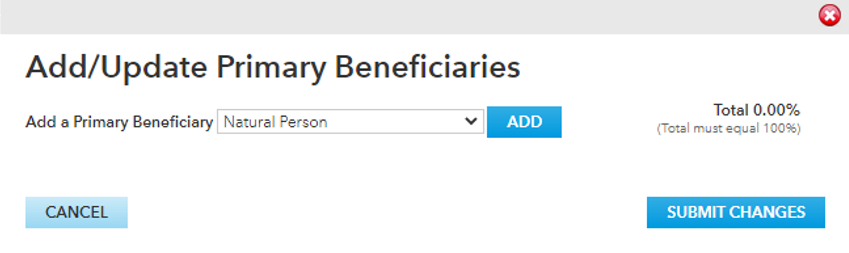
- Plan sponsors can update beneficiary designations via the plan sponsor website, as needed (e.g., if the participant submits a beneficiary designation form).
- Plan sponsors and intermediaries can view participant beneficiary designations at any time via the plan sponsor website.
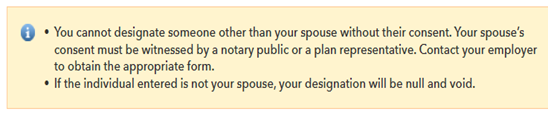
Please note that married participants are not able to designate a primary beneficiary other than their spouse online. In these cases, they will be directed to contact their employer to obtain a beneficiary election form. The participant must complete this form and obtain spousal consent as required by plan rules/regulations and then return the paperwork to the employer. The employer is then responsible for inputting the beneficiary information on the plan sponsor website and retaining the paper form with plan records.
Help Center / Deferral Designation Services
How do Deferral Designation Services work?
Deferral Designation Services are offered as a standard feature for no additional cost to RecordkeeperDirect® plans and are part of the online enrollment feature suite. These services are activated by default for all new plans and are subject to the RecordkeeperDirect Online Enrollment Terms and Conditions, which are included in the Online Enrollment Authorization form. Plans that were established before the availability of these services can submit the authorization form (available in the Forms section of this site) to activate them.
Deferral Designation Services offer the following benefits:
- New participants can make deferral elections during the online enrollment process.
- New and existing participants can modify their deferral elections after enrollment via the participant website and mobile app.
- Plan sponsors can update deferral elections via the plan sponsor website, as needed (e.g., if the participant submits a paper form).
- Plan sponsors and intermediaries can review participant deferral elections at any time via the plan sponsor website.
- For plans using automatic enrollment services, notification will be sent to the plan sponsor when an employee should be auto-enrolled or auto-escalated.

Help Center / Reports
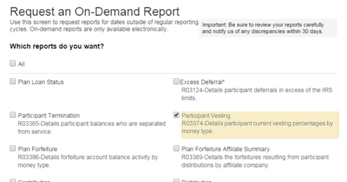
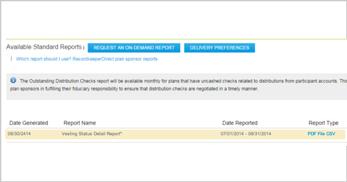
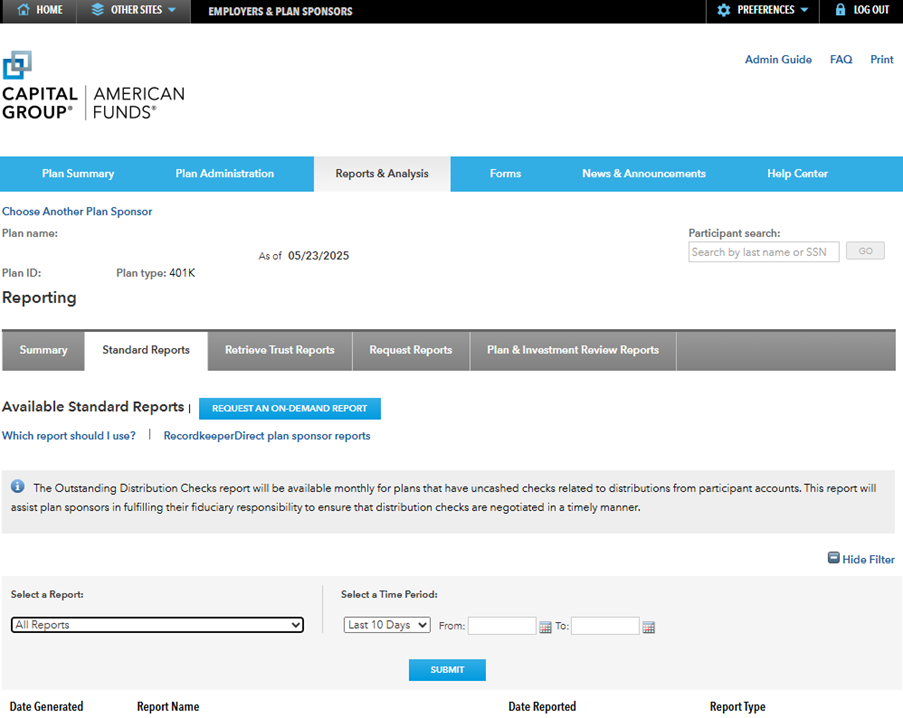
What types of reports are available?
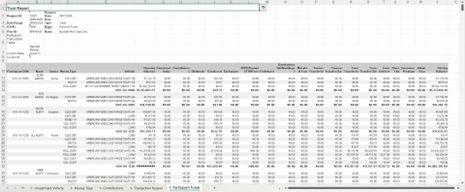
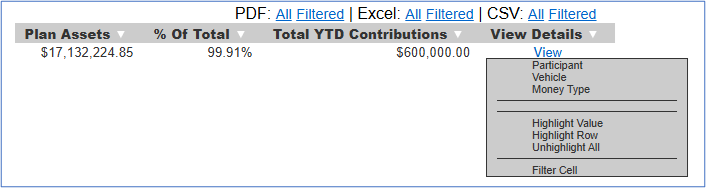
Capital Group provides you and your TPA with monthly and annual reports that offer valuable information about your plan. Many of these reports are made available on the plan sponsor website each month, with an annual summary provided at your plan’s year-end.
A brief description of these reports can be found in the RecordkeeperDirect® Plan Sponsor Reports document, which you can access on the Reports and Analysis section of the plan sponsor website
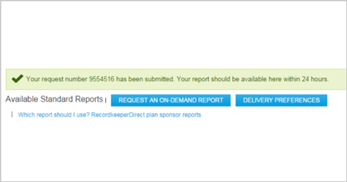
Please review these reports carefully each month. As disclosed in your Recordkeeping Services Agreement, you must notify us of any discrepancies within 30 days of delivery.
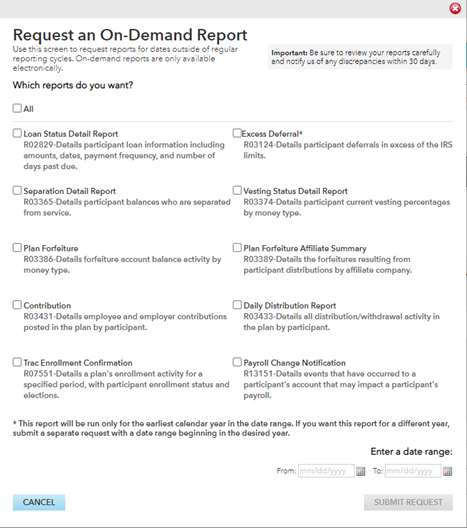
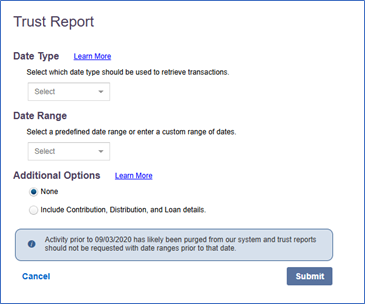
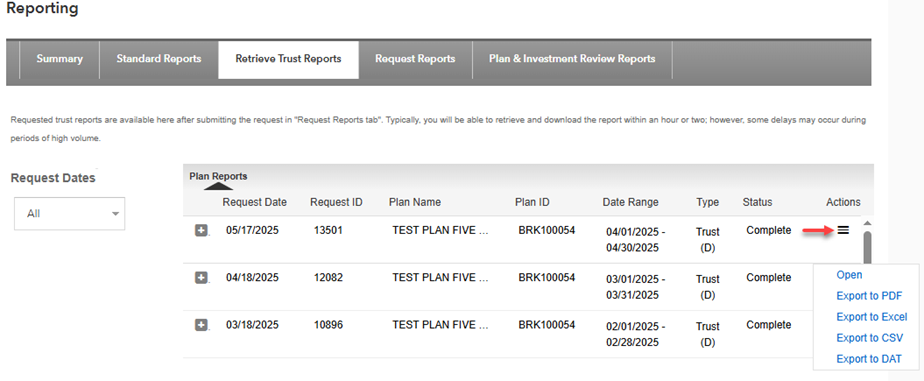
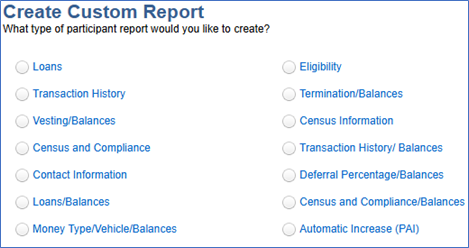
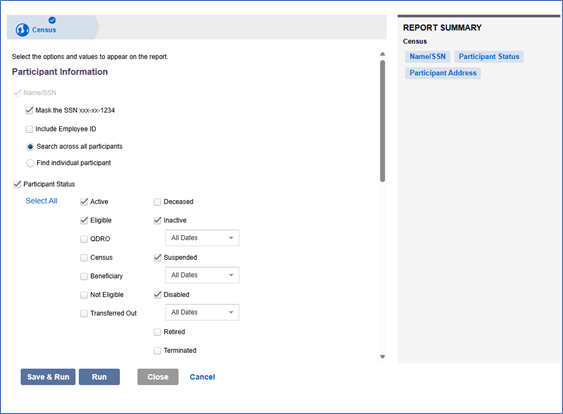
In the following sections, you’ll learn more about our Standard reports, Trust reports and Custom reports, including default templates, and how to request additional reports you will need for a plan audit.

Help Center
Explore the features of the RecordkeeperDirect website to help set up and manage your company’s retirement plan.
Explore the features of the RecordkeeperDirect® website to help set up and manage your clients’ retirement plans.
Get a quick overview of key sections of the website.
Learn how our employee deferral eligibility tracking services work.
Establish a retirement plan account for an employee/participant so they can enroll online.
-
Information you’ll need to set up a new employee/participant account
Before starting, you will need each participant’s:
- Social Security number
- First and last name
- Birth date
- Mailing address
- Current plan status (e.g. active, eligible, terminated)
- Hire date
- Plan entry date
- Phone number (optional)
- Email address (optional)
- Payroll frequency (if the plan allows for loans)
- Investment elections (not required for those enrolling online)
* Participants must be added in “eligible” or “not eligible” status in order to be able to enroll online.
- Add/Enroll participants
- How to add/enroll participants (video)
Learn how our Beneficiary Designation Services work.
Learn how our Deferral Designation Services work.
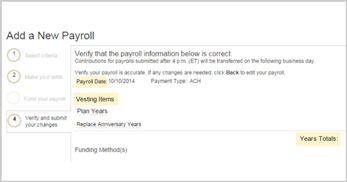
Perform key payroll tasks.
-
Information you’ll need for processing a payroll
Before starting, you will need:
- A list of payroll participants
- The type and amount of payroll deduction for each participant
- If applicable, the type and amount of employer contribution for each participant
- The total amount of both employee and employer contributions
This information can be found in the plan’s payroll report, which can be provided by the plan’s outside payroll provider or an internal payroll department.
If your plan is utilizing Deferral Designation Services — part of the online enrollment feature suite — you can also access the latest participant deferral elections through the Reports & Analysis section of this site. Refer to the Administration guide or the Deferrals section for more details about how to access this reporting.
If your plan is utilizing deferral designation services — part of the online enrollment feature suite — you can also access the latest participant deferral elections through the Reports & Analysis section of this site. Refer to the Administration guide or the Deferrals section for more details about how to access this reporting.
If forfeiture accounts will be used to fund your payroll, please consult your third-party administrator.
- Add or manage a payroll
- How to submit contributions (video)
Manage a participant’s vesting information.
-
Information you’ll need to manage vesting
Before starting, you will need:
- Employee hire date (This should be entered on the Personal & Employment Information screen.)
- Vesting computation period (If your plan specifies that vesting begins on an annual date other than a participant’s hire date, then the vesting computation period is measured accordingly.)
- Vesting computation period (If the plan specifies that vesting begins on an annual date other than a participant’s hire date, then the vesting computation period is measured accordingly.)
- Hours worked during the computation period
- Total hours of service for the current year
- Total hours of service at plan’s year-end
- Total hours of service based on participant’s anniversary date
- High earner designation (Required if plans that allow catch-up contributions want access to reporting that can assist with contribution processing and identifying any participants that may require correction. The sponsor or third-party administrator must indicate each year which participants meet the age and income criteria that require catch-up contributions to be made on a Roth after-tax basis.)
Most of this information can be found in employee records. If you are unsure of your plan’s vesting method or computation period, contact your third-party administrator.
Most of this information can be found in employee records.
- Update and manage vesting